Search This Blog

Saturday, December 3, 2011

The Wonders of Sea Salt Scrub

Hello Lovelies!!!

I hope all is well. I know its been a while, but I'm going to try to be a bit more regular with posting. In one of my earlier posts, I mentioned that I would discuss beauty issues other than hair every once in a while. So today, I thought I would talk about sea salt. Sea salt is very, very healthy for the skin. It contains sizable amounts of magnesium, calcium and potassium among other minerals. I just started using it, and its probably the best exfoliant I've ever used.

Right now, I'm using "Crystal Line Dead Sea Sea Salt." I got a 16.9 fl ounce jar from Marshall's for $4.50. (Sidebar: I looove Marshalls, especially the skin/make up section, because you can find some really great stuff for a cheap price) "Crystal Line" is a mix of Shea butter and Sea Salt. The Directions for use are as follows:

  • Wet skin and apply generous amount
  • Massage for 1-2 minutes in circular motions (sometimes I do longer)
  • Rinse with warm water
Its pretty simple, and the results are great. Your skin will feel super smooth. I would suggest using sea salt scrub at night. I say this because after I used it my skin was extra shiny - probably because of the shea butter. If you used it at night your skin will still feel extra smooth and soft in the morning. Of course, sea salt scrub can be used on the entire body, but I used mine just for my face. Right now, I want to stick to using it once a week. 

Other things to remember for healthy, glowing skin:
  • Drink water
  • Eat fruits and vegetables
  • Find a good moisturizer (I'm a cocoa butter fan lol)
If you decide to try sea salt scrub, I hope you find it as beneficial as I did!

Much Love to You!

Isn't Gabrielle Union's skin wonderful?! (I know she's probably wearing makeup... but still, lol.)


Saturday, October 1, 2011

Relaxed or Natural?

Hello Lovelies!

I know its been a while, but I had to settle into the swing of things, starting off a new semester, etc. Now I'm back, and hopefully I'll be able to post somewhat regularly. Today I wanted to add my 2 cents to the debate that has been going on for a while now - Relaxed or Natural? Which is better?

I wanted to start out by saying that my blog is mainly to provide haircare tips. Hopefully when you all, my readers, take good care of your mind, body and soul, you will feel and look beautiful. With that being said, I think the most important thing is that you all feel that you are attractive and special. Think about this, if relaxers were no longer available, how much of a crisis would that be for you? Would you no longer think you are attractive, would it be the end of the world? If the answer is yes, then there are a couple more things to think about. Why would it be such a trauma if there were no more relaxers? What is so wrong with the way that you were naturally made?  I'm not at all saying everyone should go natural, but what I am saying is that you should be appreciative of your beauty, with or without relaxers. The same applies to those of you who wear make up, those of you who would like to get an enhancement surgery or sort of beauty enhancement. Can you survive without it?

Most of the hang-ups people have about natural hair or anything else that has to do with a beauty routine comes from society. A lot of you have probably heard these:

  • Guys like girls with long hair; they don't go for girls with shorter hair
  • Natural hair looks nappy, unkept or unprofessional 
  • You'll look like a slave with hair like that (yes people say this)
  • Natural hair is for those radical girls
  • No famous people rock natural hair, so why should I?
Don't let these statements, or anything else that people say about natural or relaxed hair stop you from doing what you want to do with your hair. Some people simply like relaxing their hair, and some like it better natural. That's cool, as long as you're being persuaded by your own beliefs and desires. I've been saying it and I'll say it again - whatever you choose to do is great as long as you love yourself with or without the enhancements. 

I'm going to do a list of pros for natural hair, then a list of pros for relaxed hair, so that you can decide what you'd like to do with your hair.

Natural Hair Pros:
  1. It is not effected by the strong chemicals in relaxer, so it tends to break less easily
  2. You don't have to worry about water, whether from rain or swimming (although you MUST condition your hair after swimming!)
  3. Less heat damage, no flat-ironing or blow drying necessary
  4. There are tons of cute styles, from the twist out to the afro-puff
  5. Hair grows faster because it breaks less
  6. Natural hair products (in my opinion) smell better and tend to have more natural, and healthy products
  7. No more paying for the hair dresser!
Relaxed Hair Pros
  1. Growth is more noticeable, because relaxer stretches natural curls
  2. Tends to be easier to comb than natural hair if the correct products are used
  3. There are many possible hair styles
  4. There are more hair dressers who know how to work with relaxed hair
  5. When managed well, hair can be very long and flowing 
  6. Other than the long days at the hair dresser, relaxed hair can be a little less time consuming than natural hair (depending on your regimen)
If you read My Natural Hair/Transition Story, you will get to understand why I switched from natural to relaxed hair.

I hope this helps!

Be Big and beautiful!

xoxo

Angela Bassett! So beautiful, and a great actress


Thursday, September 8, 2011

Defining Your Natural Curls

hello lovelies!

Up until very recently, I was frustrated, because although my hair is naturally curly, oftentimes my curls are disguised by all my frizz. I watched Nikkimae2003's youtube channel: http://www.youtube.com/user/Nikkimae2003 and discovered that cold water really helps to define curls! Here's how it works:

If you're doing a co-wash (thats cleansing/conditioning hair without shampoo)

  1. Wet/rinse the hair with warm to very warm water. This helps to open the pores in your scalp. Some of you may have heard that using steam (which comes from warm water) is very good for cleansing the pores in your face, well, your scalp works the same way. Open pores are ready to absorb the conditioner that you'll be putting into your hair.
  2. Apply some conditioner and let it soak in for as long as you want. I usually let the conditioner sit for about 5-10 minutes. You can also detangle during this time. I personally detangle after I condition, that way I'll have enough time to detangle my hair section by section.
  3. Rinse out your conditioner with cold water. Cold water seals in the moisture provided by the conditioner, which really helps to define curls. I just started cold water rinses and I love the effect on my hair. Each curl is springy and shiny, and the frizz is basically gone!
If you're shampooing your hair
  • Still use warm water, because the shampoo will be able to do its job even better when your pores are open. Warm water, especially in combination with shampoo, is excellent at removing grease and other residue. After shampooing, follow the steps outlined above.
My hair after a cold water rinse!


I just wanted to add that Nikkimae2003's youtube channel is great. She's pleasant, encouraging, and her tutorials are super helpful.

Be Big & Beautiful!

xoxo
Tia & Tamera Mowry! They've been my role models since childhood :)

Hair Vitamins and Balanced Diet

hello lovelies!

I know a lot of us get impatient with our hair's growth, and just want a quick fix. After my big chop I really wanted my hair to just hurry up and grow, I started to research on hair growth supplements. The most prominent one that I found was Biotin. Biotin is in the B-vitamin family; it is also called B7. Biotin helps in the production and metabolism of fats and amino acids (protein!). So, as you can see, fats and protein have been a recurring theme when it comes to hair health.  The body also needs Biotin for the growth of healthy skin and nails. It is generally advised that people suffering from hair loss take Biotin to replenish their hair growth. WebMD provides more information on the effects of Biotin on the body (WebMD: Biotin)

I when found out that Biotin does so much good for hair growth, I decided to start taking it to see  how it would effect my hair growth over a month. I got a bottle of Biotin pills from the Vitamin store, and I was so excited to try it out. I took one pill a day for about two weeks. I wanted to continue taking it once a day for at least a month, but I had to stop, because I had started to break out. I usually get a few pimples every so often, but with Biotin I got full on ACNE. One of the interesting things about Biotin - or Vitamin B7, is that is helps to maintain and/or increase hormone levels. I guess for me, breaking out is one of the things that come with increased hormone levels. I'm definitely not saying anyone who takes Biotin will have a case of acne, but what I am saying is to try it and see how it effects your body. Biotin is water soluble, which means if your body has too much Biotin and doesn't need anymore, the extra will come out in your pee, so don't worry.

Now, I limit my intake of Biotin to twice a week. Drinking water also helps to counteract the acne. I also rely on other vitamins that are important to hair growth, including: vitamins A,C, and D, most B vitamins, calcium, gelatin, MSM and silica. Multi-vitamins usually have all of the vitamins I just listed. So, take your vitamins, eat healthy and exercise and you'll be on your way to healthy hair, and good health over all.

I also wanted to emphasize the importance of DRINKING WATER. It truly does help. A lot of us have heard that the body is 70% water. Well, that's a very important fact, because our body uses water for most processes, including hair growth. Water is hair''s main source of moisture. This means that the body will always need to be replenished with water. 8 glassed of water a day and you'll be straight.

I definitely say to try Biotin and see how it works for you. Even if you don't, still try to remember to take your multivitamins!!!

Be Big & Beautiful!

xoxo

TLC. They're so awesome. Fly ladies lol

Sunday, September 4, 2011

Hair Growth Plan for Fall 2011

hello lovelies!

One of the interesting things that I have discovered about having natural hair is that uneven growth becomes much more noticeable. The hair on the top of my head has always grown faster than the sides and back, but when I was relaxed it was easy to disguise because I would just have my hairdresser cut my hair in layers. Now its different - I don't have that perfectly rounded afro that many people rocked in the '70s. As a matter of fact, when washed and combed out, my hair takes a fro-hawk shape. Well - its not THAT extreme haha, but the top is a little more than 5 inches while the some parts of the sides are between 3 and 4 inches. I know my hair will always grow that way, so my focus is on retaining the growth that does occur and making my hair grow thicker and stronger. 

For this fall, I have decided to add some products to my regimen that I have researched and watched many youtube videos on. To track my progress, I plan on doing a growth check every month. Hair grows about a 1/2 inch each month, so if my hair growth plan works, I should have another 1.5-2 inches of growth my the end of December.

The first addition to my regimen is an Castor & Olive Oil mix. I mentioned this oil mix in my hair regimen blog post, but I wanted to talk about it in a bit more detail. I am using a proportion of 1/4 Castor Oil for every 3/4 Olive Oil. I use Tropic Isle Living Jamaican Black Castor Oil and Wal-Mart brand Extra Virgin Olive Oil. I bought a color applicator bottle to apply my oil with because it has a tiny nozzle. I really don't want to use a lot of oil at a time because it'll drip and just make my hair greasy and heavy and a tiny nozzle will ensure that not too much oil comes out at a time.

My Hair Growth Ingredients!
Why Castor Oil?

Well, growing up in a Jamaican household, Jamaican Black Castor Oil (I'll be calling it JBCO from now on) is usually in the house. My mother used to moisturize my hair with it when I was younger. When I started taking care of my hair myself, I didn't use it as much, but now that I've done my research on good hair growth products, I've realized why castor oil is a staple in so many Jamaican households. I am biased towards JBCO as opposed to other castor oils because its darker and thicker, and has a stronger scent - for me, that means that it is more natural and has gone through less processing.

Background, Benefits, and Uses of Castor Oil:

Castor Oil is a type of Vegetable Oil derived from Castor Beans. Castor Oil is mostly composed of fatty acids (in my cholesterol blog I said that fats are very good for the hair cuticle).

Benefits:
  • It can penetrate deep into the skin and can be used to to treat many skin conditions - and your scalp is skin too!
  • Because it penetrates the skin, it can reach the hair's follicle (your roots!) and nourish it. This leads to stronger hair that is more resistant to breakage.
  • Helps to prevent hair loss, treats thinning hair and dry scalp
  • It also helps to keep the scalp cleansed and healthy
  • It is a humectant, which means that it can absorb water from the air - more MOISTURE!
  • Castor oil is good for other conditions and ailments. Its other uses can be found here.
Background, Benefits, and Uses of Olive Oil:

People have been enjoying the benefits of Olive Oil since the rise of Ancient Greece. There is even a Greek goddess for Olives & Olive Oil named Athena. Homer called it "liquid gold." Many of you probably use it as cooking oil & eat it in salad dressing, but its great for you internally AND externally. 

Benefits
  • Extra Virgin Olive Oil is an excellent skin moisturizer. It easily penetrates the skin, softening tissue and rejuvenating the cells
  • It prevents dandruff
  • It can be used daily, as a hot oil treatment and as a deep conditioner. More info on olive oil can be found here.
So yeah! Thats the lowdown on Castor Oil & Olive Oil! I'll be massaging a little bit into my scalp most nights before bed, then covering my hair with a satin bonnet to lock in the moisture.

In addition to applying oil to my scalp, I will be adding water & vitamins to my hair on a regular basis. Infusium 23 Pro-Vitamin Leave-In Hair Treatment mixed with water is my choice for hair vitamins. What I usually do its add 1/4 Infusium 23 for every 3/4 of water. I put this mixture in a spray bottle, and use it to dampen my hair before I twist it or do any other sort of style to it. Then, I detangle with a wide tooth shower comb. I like this treatment because it makes me feel confident that my hair is getting the vitamins it needs, especially if I hadn't been eating healthy and/or forgot to take my vitamins. 


I'll continue my oil & water treatments through the fall and let you know if they affected the overall health when I do my winter hair regimen plan.

I also wanted to add that it's important to remember that what you put IN your body is almost more than what you put ON your body. Look at it this way,

For example, instead of applying more make up when you get a pimple or two, ask yourself:
 - Am I drinking enough water?
 - Am I eating too many fatty foods?

The same applies to your hair, if its breaking too much, or is way too dry ask yourself:
 - Am I eating healthy foods?
 - Am I stressed?
 - Am I sleeping enough at night?
 - Am I taking my vitamins?
 - Do I exercise?

I ask myself these questions, and sometimes the answer is no. And the thing is, all of these things lead to healthy hair. Sometimes we forget the things we apply externally aren't enough, and thats okay, as long as we try to make a change and take care of our insides too.  Love yourself and take care of your body - you'll be surprised at how phenomenal your results will be! Taking care of yourself will put you in a better position to take care of others. Being able to be there for the ones we care about, to support and encourage them is an awesome capability! Love yourself so you can love others,

Be Big & Beautiful

xoxo

MARSHA!!! Love her both solo and as a member of Floetry


High Cholesterol: Key to A Healthy Hair Diagnosis

hello lovelies!

In an earlier post I mentioned that I really love the effect of cholesterol treatments on my hair. Its my favorite way to condition my hair. Every so often I experiment with homemade conditioners - mostly mayonnaise mixed with olive oil - but I like to buy my cholesterol because it doesn't need to be refrigerated. One of the best things about cholesterol, other than its conditioning and moisturizing effect is the fact that its very affordable and long lasting. The average jar of cholesterol that I buy is about $2.99 and last me for at least 2 months. Great value!

So, what is cholesterol anyway?
Well, it is a soft and waxy substance found in the lipids (fats) in the bloodstream and the body's cells. (source) Cholesterol is important to cell membrane creation and maintenance, among its other functions. Most of the time we hear about the dangers of high cholesterol, but a healthy level of cholesterol is necessary for many of the body's functions (see here for more info on cholesterol in the body).

Why is it that hair responds so well to cholesterol? 
Let's break it down. Time for a mini biology lesson!

A hair is composed of: 80% protein, 10-15% water, and 5-10% pigments, lipids (also called fats), and minerals. (source) The cells on the hair follicle are surrounded by a lipid layer and this lipid layer is bonded to the proteins that hair is mostly made of. Basically, there are many fatty acids in the cuticle of the hair (the cuticle is the outmost layer of each hair strand). The fats in hair are responsible for how well the hair locks in moisture and the overall stiffness of the hair. So, if fats are a part of the structure of the hair, and the cholesterol contained in fats is responsible for maintaining the cell membrane, then applying cholesterol to hair is good for the fats that make up the hair cuticle (source). When cholesterol is added, hair gets hydrated and becomes much more supple, or flexible.

****Most important thing to remember: Hair + Cholesterol = Soft & Supple Locks****

Also, cholesterol taken internally won't help hair health. We all should be having low cholesterol diets to limit the risk of coronary diseases. In other words, eat your cheerios!!!
Reduces cholesterol, so eat up!
Ok, enough science talk. I wanted to introduce you to some of the cholesterol treatments I have tried over the years. I will be ranking my top 4 treatments from favorite to most favorite:

4. Hollywood Beauty Tea Tree Cholesterol with Shea Butter & Aloe. This stuff is great! The title was enough to convince me to try this product. Tea Tree Oil is ideal for anyone with scalp issues, especially dandruff, and its a natural scalp cleanser. I have a healthy scalp, so I find tea tree oil to be a bit drying, which is why I didn't rank this product higher. The Shea butter is moisturizing and the Aloe is soothing. The one thing I don't like about this cholesterol is it's strong medicinal scent. Grade: B


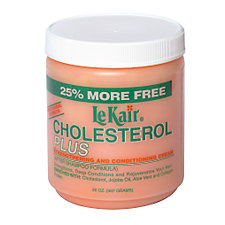
3. Le Kair Professional Strength Cholesterol This is a nice standard cholesterol. It smells nice and it nice to deep condition with. After shampooing, saturate your hair with this, cover your hair with a plastic cap, heating cap, or hot towel, and/or sit underneath an overhead dryer for about 15 minutes and your hair will love you for it! Grade: B+


2. Queen Helene Cholesterol Hair Conditioning Cream I LOVE this cholesterol. its cheap, moisturizing, and is just great over all. As a matter of fact, I like the Queen Helene product line in general I like their cocoa butter too! You can do the same things with Queen Helene's as you can with Le Kair. I almost always have a jar of Queen Helene's in the bathroom. Grade: A


1. Silk Elements Mega Cholesterol Conditioning Treatment. YES, yes and yes. This is my favorite cholesterol to date. It smells awesome, and its soooo smooth and soft on to the touch. You can feel the difference right away! It's usually a dollar or ten this is your fix. Also, this conditioner is GREAT for detangling in the shower. Grade A+ 


If you don't know, now you know - the value of cholesterol. It's my hair crack lol! And I already mentioned that I'm a product junkie so you can imagine how much I use haha

I hope you found this to be helpful!

Be Big & Beautiful

xoxo

Lauryn Hill - She is the TRUTH.


Saturday, September 3, 2011

Product Review: Silk Elements Mixed Silk Leave-In Conditioner

hello lovelies!

I thought it would be nice to do product reviews every now and then. There is always some new product out there professing to make our hair long and luxurious, and as a person many would call a "product junkie" I often give in to their claims about how awesome their product it. But, before I hit up the beauty store I want to know how a product will respond to my hair, so I usually do my research before investing in a new hair product. I say "usually" because I spontaneously bought the particular product I'm about to review. I guess bought it without thinking because I trust the product line its from. A piece of advice for you - research the ingredients and reviews on a product before you buy a product!!!

I say this because I didn't love the product I'm reviewing today: "Silk Elements Mixed Silk Leave-In Conditioner"
17.25oz conditioner, about  8 inches tall
When I used relaxer, the Silk Elements product line was my staple. The relaxer itself treated my hair well, the shampoo didn't damage my hair cuticle and the cholesterol treatment was (and still is) fantastic. So, when I went to Sally's Hair & Beauty Supply (http://www.sallybeauty.com/) about a week ago and saw that they opened a line of products for people with natural curls I got super excited. They were on sale so I picked up 2 bottles and the accompanying deep conditioner. I thought it was going to be wonderful. A couple days later, when it was time to do my shampoo and deep condition, I added this leave-in conditioning creme to my routine. It's creamy, but a but slick to the touch, and smells kind of like dish soap. It was different than other products I use that are more thick and heavy. I used about 3 pumps and ran it through my hair with my fingers, combed, and did a two-strand twist set. The next day when I untwisted my hair, I wasn't completely pleased with my results. My curls held up ok, but the hair itself was not completely moisturized.  The directions say, "Apply to clean wet hair from roots to ends for an even application. Do not rinse out. Hair can be air dry or use a blow dryer with diffuser.To me, it seemed as if it this conditioning creme could be a stand alone product, but that wasn't the case. The fact that I needed to add oil moisturizer to my hair after I untwisted indicated to me that I shouldn't have used this product on its own. All in all, I will give "Silk Elements Mixed Silk Leave-In Conditioner" a 8 out of 10.

Pros about the Conditioning Creme:
  • It has a pleasant scent
  • It is not greasy 
  • It has natural oils including Jojoba seed oil, Safflower seed oil and Evening Primrose Oil
  • It contains amino acids including wheat amino acids and silk amino acids (amino acids are the building blocks of proteins, and proteins are very good for strengthening hair
  • It is a very good detangling product
Cons:
  • It is almost too light. I like products that seal the hair cuticle well and I'm not sure that this does. More "liquidy" products like this one are absorbed by the hairs, but don't seal out dryness
  • It detangled my hair, but didn't provide long term moisture, which is very important to me. 
Although I have listed more pros than cons, I still believe this product is a 8/10 because it isn't good at retaining the hair's moisture. I will say that it is a very good base product, and what I mean by that is that its a good thing to apply as a detangler while your hair is still wet and it doesn't clash with the styling cremes I use. Overall,  I would suggest trying it because it's always good to have a leave-in conditioner, especially if you can't deep condition your hair as often as you'd like to. I'll definitely use mine as a detangler (after all, I have two bottle get through lol)

I hope this helps!

Be Big & Beautiful

xoxo

Beyonce: radiant and stunning! (and pregnant - yay!)


Friday, September 2, 2011

Retaining Moisture

hello lovelies!

Whether relaxed, natural or anything between, the number one priority in your hair care regimen is to add and retain moisture.

MOISTURE
MOISTURE
MOISTURE

Yeah, its so important that I will repeat myself. Your hair NEEDS MOISTURE. Why?

  1. Well, your hair will look nice, because moisture brings out your natural shine, and for curly tops - moisture defines curls.
  2. It will prevent breakage. Hair snaps easily when dry. Breakage is your mortal enemy, and moisture is your best friend.
  3. Moisturizing products will nourish your scalp. A healthy scalp is a happy scalp. And a happy scalp grows more hair.
People with type 4 hair are the most vulnerable to dryness and breakage. This is because its very thin and wiry, and has less cuticle layers to protect it. For all of you with type 4 hair - treat it like silk. Your hair is a precious fabric, and if you want it to last you have to care for it properly!

My links (dispersed below) will direct you to some of the different products I've used. Click away!

I've tried many different moisturizers during my transition. Some of them include:
  • "Pantene Pro-V Relaxed & Natural for Women of Color Daily Oil Cream Moisturizer" (description here)
  • "BB Hair Moisturizer Lotion Maximum Strength" (description here)
  • When I was transitioning I used "BB Foam Wrapping Lotion" (description here)
I intermittently researched natural products during my transition period, and the first one I bought was Raw Shea Butter. Shea Butter is actually the bomb lol. Now, anytime a buy a new product, I usually check if Shea Butter is one of the ingredients. I use it to seal in moisture after I condition my hair, and have also found it to be a great styling product. I will create a separate blog post about the wonders of Shea Butter so you can understand why I like it so much. I would definitely suggest it as a staple for any natural hair regimen. I bought my shea butter in bulk (5 lb.) in the Winter of 2009, and I STILL have some left. I got it cheap from a great website called Shea N More. They offer all kinds of natural products at affordable prices. 

In addition to Shea Butter, I discovered that  Natural Oils, and Cholesterol  are very helpful it adding moisture to my hair. 

Products that will lead to moist hair:
  1. A good co-wash* conditioner. It doesn't have to be pricy. VO5 or Suave Hair Conditioners would do the trick.
  2. A hair strengthening leave-in conditioner. Right now I am using Infusium 23 diluted with water. I put the Infusium 23 solution in a spray bottle and use it to dampen my hair on a regular basis.
  3. A nourishing carrier oil. Carrier Oils seal in moisture and protect the hair follicle & scalp. Right now I am using a mixture of olive oil, with a little bit of Castor Oil (article on carrier oils to come later)
  4. A good Deep Conditioner. I like hair cholesterol best as a deep conditioner, because it always makes my hair soft & bouncy. My 2 favorites are Silk Elements Mega Cholesterol Conditioning Treatment and Queen Helene Hair Conditioning Cream
  5. A great daily moisturizing cream. BB Hair Moisturizer Lotion Maximum Strength works pretty well, but I just started using Shea Butter Coconut and Hibiscus Curl & Style Conditioning Milk
To summarize, find some way to moisturize your hair every day. It has really helped me to retain the growth I've had so far, and is certain to help me in the future. If you have any moisturizing methods/routines you'd like to share please do!

Be Big & Beautiful, 

xoxo

Indie Arie - one of the Neo-Soul Moguls. Love her!


My Current Natural Hair Regimen

hello there wonderful people,

One of the things that will lead to the growth of Big & Beautiful Hair is developing a hair regimen that you believe you will be able to stick to. I now have over 5 inches of hair, and with hair as thick as mine now is, I've found it a bit more difficult to take care of than when I had a TWA. So, I have decided to outline my weekly hair care plan. This is especially important to me now that I am starting a new semester. I need to know what I'm doing with my hair on a regular basis because with all my commitments during the year, my schedule gets crammed.

Outlining my regimen is a new thing for me, because I usually just go with the flow when it comes to my hair, but my hair growth has been so encouraging that I want to really follow through on a good plan. So if this is new for you, don't worry because its new for me too - we're on this hair journey together :)

This is 90% likely to be my weekly schedule. The 10% of doubt is because I haven't started classes yet so I don't know which days of the week are going to be my busy days.

SUNDAY:

So, Sunday is gonna be my spa day. That is, I will be shampooing and deep conditioning each Sunday night so that I can be fresh for class on Monday morning. I may change my shampoos to every other Sunday in the winter time. Why? Because the air is driest in the winter, and I don't want to over dry my hair by shampooing too often. Conditioners, which I will be using very frequently, have cleaning agents that can take care of the build up that develops in my hair over 2 weeks. However, I don't know what winter has in store for me so I'll decide how often I want to shampoo then.

Sunday night plan:

  1. Pre-Poo! (Before Shampooing) Moisturize my scalp with a blend of olive oil & castor oil,  then go through my hair ends with a dime size amount of Shea butter.
  2. Poo: Shampoo with a sulfate free shampoo (we'll talk about sulfates later)
  3. Deep Conditioning: Using hair cholesterol, or a really good deep conditioner. Allow to soak in hair for about an hour. If you have the time, you can allow your deep condition to stay over night.
  4. Leave-In Conditioner: I use a leave in conditioner to comb out my hair while wet. I only comb my hair once a week, using a wide-tooth shower comb. For the rest of the week I finger comb
  5. Detangling and Twisting: after I detangle my hair, I do large to medium sized two strand twists. It should take about a half to twist my hair and in the end I should have about 15 twists. The twist out is my favorite style because it's easy and seals in moisture. They styling product I use to make my twist springy and shiny is a Shea butter based styling creme (I'll list the specific products I use in another post). I add a dab of styling creme to each twist I make to get the best results.
  6. Sleep with a satin bonnet and a satin pillow case. Both satin bonnets and/or satin pillowcases can be bought at an affordable price at your local beauty store, or online. Cotton absorbs moisture, which is why its important to use a satin bonnet, scarf, or doo-rag to protect your hair.
MONDAY:
  1. Untwist and style! (Then go to class)
  2. At night - massage an olive oil/castor oil into into my scalp
  3. Add a little styling creme to maintain twists
  4. Spray to dampen with water
  5. Re-twist 
TUESDAY

Same as Monday

WEDNESDAY

Co-Wash Day!
  1. By Wednesday I like to give my pores some air buy rinsing out all the product I've used. Using a cheap, but moisturizing conditioner, wet hair while showering, comb through conditioner, leave in for 2-5 minutes, and rinse.
  2. Massage in my Olive/Castor Oil Mix
  3. Style (another twist out set with conditioning creme)
THURSDAY

Back to Monday's schedule

FRIDAY

Depending on the dryness, I will do another co-wash. If not, I'll do my Monday schedule again. 

SATURDAY

Another Olive Oil/Castor Oil Massage Day! 

I already have all the products I want to use lined up, and I will be doing a post with details on all the products I use!

Be Big & Beautiful!

xoxo
Alicia Keys back in the day! <3 Her

S/O to My Relaxer/Permanent Straightener Users!

hello lovelies!

I just wanted to make a post for all of you ladies who use relaxers and other permanent straightening (or curling) products - this blog is for you too! I've been relaxed more of my life than I've been natural so I will definitely adding hair care tidbits for you too! I just want to make sure all of the females (and males!) reading will be encouraged and trust that anyone of African descent can have Big & Beautiful Hair! Don't believe the hype. Black people don't have "bad hair" and  black people aren't just "nappy headed." Its just a matter of misinformation. If we are properly informed, then we will have better results. All of this to say, please, everyone, no matter what hair type you have, feel welcome to read and comment! 

Be Big & Beautiful!

xoxo

Corinne Bailey Rae - Singer

My BC and Hair Growth Through August 2011

hello wonderful people!

I'd like to share my big chop experience with you. I cut off all of my relaxed ends on December 10, 2010.  I must say, I didn't choose the safest and most professional way to cut off 6+ inches of hair. I was tired of dealing with my relaxed ends - so I just took a scissors out of my drawer and chopped it all off. Prior to my BC, I had thought about cutting my hair a couple times, but I never planned a BC day; it was an impromptu decision. Luckily, it turned out ok! It wasn't too lopsided or anything like that lol.

I started snipping away from the back
because it was easiest to sense the texture difference


Halfway done! There was no going back!


Here's a little side angle. I think I had like 1.5 inches of hair


Top of my head. My TWA!


Side profile. I eventually clipped away any leftover relaxed hair


The final product!!!! Nappy & Happy haha


And there you have it!!! As a college student I didn't have the time to really invest in my hair like I have over the past summer, so wash and go* styles where my staple. I LOVED (and still love) bobby pins and head bands. When I had a bit more growth, I began to rely heavily on twists and twist outs. I was struggling with developing a hair regimen that fit my schedule, so I'm not sure I achieved my full growth potential over the past two semesters. In the summer however, when I had the time to really take care of myself, I did see a difference in length. Take a look:

December 11 - first full day natural! My hair after a perm rod set


Side view! My first Frohawk* :)


December 21, 2010 Two-Strand Twist Set 


January 7, 2011. My curly q's a month after BC


January 7,  Side Profile


Top of my head on February 18, 2011. Two Months Natural!
By this point I had no relaxed ends


February 21st: Hair length check!


June 9. Six months natural! In the summer, I began
 nurturing my hair so it could grow


July, 4 (that's a headband if you can't tell)


August 25th. Twist Out!


August 26th. Same twist out from the 25th lol


I've gone from 1.5 inches to 5.5 inches and its been great. I feel like right now my hair is at its healthiest since my BC because I've been taking care of myself - my body and my mind. I hope to see even more progress by my end of my 1st year of being natural.

Right now, I am in the process of developing a routine that will fit into my schedule. I want to maximize both time and results. You're probably as busy as I am, so I know saving time is important to you too. Another one of my major concerns is money. If I can find I way to save money, I'll do it. Hair care does NOT have to be expensive. its just a matter of making smart purchases. Now that you have a general idea of what my hair journey has been, we can dive into the details of Black Hair Care - So much more to come!

Be Big & Beautiful

xoxo

Jill Scott! My favorite song by her: "Golden"

HAIRvolution: My Transition Period

Hello lovelies!


This has been one of my favorite blog posts to make so far. I really hadn't realized how much my hair had changed until I collected all the pictures I had taken of myself!

Changes in my hair: October 2009 - November 2010

October 22, 2009. Relaxed Hair - Chin Length

So, like I mentioned in a previous post, my hair had been chin length for a couple years and I really wanted some growth. 


November 13, 2009. Updo - New Growth!

To retain growth, I stretched my hair, which means I waited longer than 8 weeks to relax my hair. I prevented the breakage that comes with waiting too long for another relaxer by deep conditioning


July 17, 2010. This was my third and successful transition.
I was a hot mess lol
So, until June '10 I had been relaxing, here you can't see much hair growth because I had just started my 3rd transition attempt


October 8, 2010. New Growth!!! I was so excited

Close up on my new growth a couple months later. I believe I was still flat ironing to blend the two textures together, but that was making my hair dry, as you can see in this close up


October 11, 2010. Another Updo!
They really helped during my transition


One of the good things I did during my transition was up-dos. My hair was kept in one place, so I touched it less and the cold, dry, air didn't affect it as much


October 31, 2010. I was so proud of the new growth!


By October 2010, I had gotten the hang of taking hair of my roots - check out those waves haha!


October 31. It was really dry here


The center/back of my head was so much more course than the rest of my head, I loved combing my hair (not good), so I had some breakage in the back.


November 1, 2010. Twist Out on Transitioning hair

My first recorded shea butter twist out!!! look how shiny it is! (we'll talk about the power of shea butter at a later)


November 2, 2010. Flat Twists on Transitioning Hair.
They weren't fresh (at all) but they got the job done!


And this is my flat twist set. Trust me, I've gotten better at flat twisting since then!
Back view of my flat twists


November 6, 2010. Another New Growth Check.
I was getting impatient and wanted it to grow


November 6, 2010. Perm Rod Set!
One of my Favorite Protective Styles

I must say that Perm Rods were the best for me during my transition. I loved it. It held curls for my relaxed ends while protecting my natural roots


November 20, 2010. Flat Ironed Hair (I shouldn't have
used heat). Last pic I took before my Big Chop!!!


Last recorded flat iron! And look - my hair finally grew past chin length :)


All in all my transitioning phase was long and took A LOT of patience. I had to learn to be gentle with my hair instead of treating it like my old Barbie dolls' hair. You know, all that vigorous combing and brushing those of you who had Barbies used to enjoy doing. Nuh-Uh! Any of you in transition must treat your hair like its silk or cashmere, be DELICATE. Your roots will love you for it, and you'll have the cutest fro when you do your Big Chop. My next post will have pics of my Big Chop and a little reflection on the day I went natural.

Be Blessed, Big & Beautiful!

xoxo